CADFanatic’s Tips & Tricks Tuesday – An Easier Way To Mate
Welcome to CADFanatic‘s Tips & Tricks Tuesday! Hopefully, this will become a regular feature here on CADFanatic. Every Tuesday I plan to post a short tip or trick that will hopefully help you become more proficient with SolidWorks.
So at a SolidWorks 2009 What’s New presentation I gave a couple of weeks ago, I was working in SolidWorks and mating two components together. As I added the mate, literally everyone in the room said in unison, "How did you do that?? Is that a new feature in 2009?"
I was a little surprised to the reaction, as it is something that I have been using since I first started using SolidWorks back in 2004.
To my knowledge, it is not directly documented in the Help (I can’t find it anyway…), although there is a reference to a peg-in-hole SmartMate that works similar to this. Ricky Jordan showed this trick to me back when I was taking the Essentials classes.
So On With The Tip Already!
If you hold down the Alt key, and then click and hold a feature of one component, you can then drag the component to another, and SolidWorks will attempt to create an applicable mate.
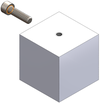
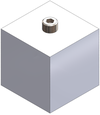
 For instance, you can mate a screw to a hole in one step, creating two mates at once. Simply hold down the Alt key, select the bottom edge of the screw, and then drag to the edge of the hole.
  This will create both a Concentric and Coincident mate at one time. (This is what I was originally after when I was taking the Essentials class, as I had moved from Autodesk Inventor and wanted my one-step Insert mate!) If the Coincident mate is applied such that the screw is inserted backwards, simply hit the Tab key to flip the alignment.
This works with most of the standard mates. You can use it to position countersunk screws, or mate faces coincident or flush to other faces.
So I hope this was a useful tip. I figured it was common knowledge, but based on the feedback I got in the presentation, there may not be that many folks out there who know about this. Was this useful to you? Let me know in the comments.
Do you have any special tips or tricks you use to make working with SolidWorks faster or easier? Email them to us at [email protected] and it may be featured on a future CADFanatic’s Tips & Tricks Tuesday!


Pingback: CADFanatic’s Tips & Tricks Tuesday - An Easier Way To Mate | CADFanatic()
Pingback: An Easier Way To Mate, Part Deux (With Video!) | CADFanatic.com()